Lo-Dough Mug Cake Perfection - A step by step guide
Lo-Dough is the ultimate low-carb, low-calorie product - once blitzed down to a crumb in a food processor or Nutri-bullet, it becomes a versatile baking ingredient that can be used in an endless number of sweet and savoury recipe combinations.
Here's a step by step guide to making a perfect and adaptable mug-cake recipe using Lo-Dough. Swap in or out any fruits, nuts, chocolate or other flavours to make these creations your own.
Top tip: Lo-Dough is made entirely from protein and fibre. As such they're incredibly light but very filling. Each piece contains a 3rd of your daily fibre requirement!

Step 1: Break your Lo-Dough down to a crumb
In a food processor/Nutri-Bullet, blitz your Lo-Dough until it is a crumb-like textue.

Step 2: Get your other mug cake ingredients ready
On top of your Lo-Dough crumbs, you will need a heaped teaspoon (or two if you have a particularly sweet tooth) of sweetener – either white or brown, one large egg and around 20-30g of yoghurt/crème fraiche - a good dessert spoon. Further to that, you need to add 90-100g of your main flavouring ingredient(s). We’ve gone with pear and almonds - a classic flavour combination.
Other combinations include:

Step 3: Add your ingredients to the blitzed Lo-Dough
Add all your ingredients to a bowl – you may wish to lightly beat your egg first. If using harder fruit such as pear, give this a minute in the microwave with a couple of spoons of water first, just to help soften it. For soft summer fruits, this won’t be necessary. You can also add liquid flavourings here – vanilla extract, almond extract etc.

Step 4: Mix to create your mug cake batter
Mix well with a fork until it comes together as a cake batter.

Step 5: Cooking the mug cake
Push down into your mug to make sure you have a flat base for when it's turned out. Don’t apply too much pressure as this will make your cake slightly denser. Microwave for 2 minutes and allow to stand in the hot mug for a further minute before turning out.

Step 6: Finishing your mug cake
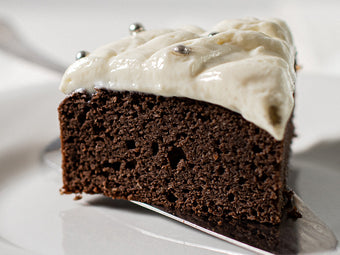
Turn your cake out of the mug and on to a plate - it shouldn't stick to the mug and will just need a sharp tap. Garnish with fruit, yoghurt, syrups, compotes, nuts, chocolate – anything you like that would best fit into your diet.